Creating an Entra ID Connector
This guide walks you through creating a new Entra ID (Microsoft Azure AD) connector in GrantFlow. Entra ID connectors enable cloud-based identity management through Microsoft Graph API without requiring an on-premises agent.
Prerequisites
Before creating an Entra ID connector, ensure you have:
- Azure AD Tenant Access - Administrative access to your Microsoft Entra ID (Azure AD) tenant
- App Registration - An Azure AD application registration with appropriate permissions
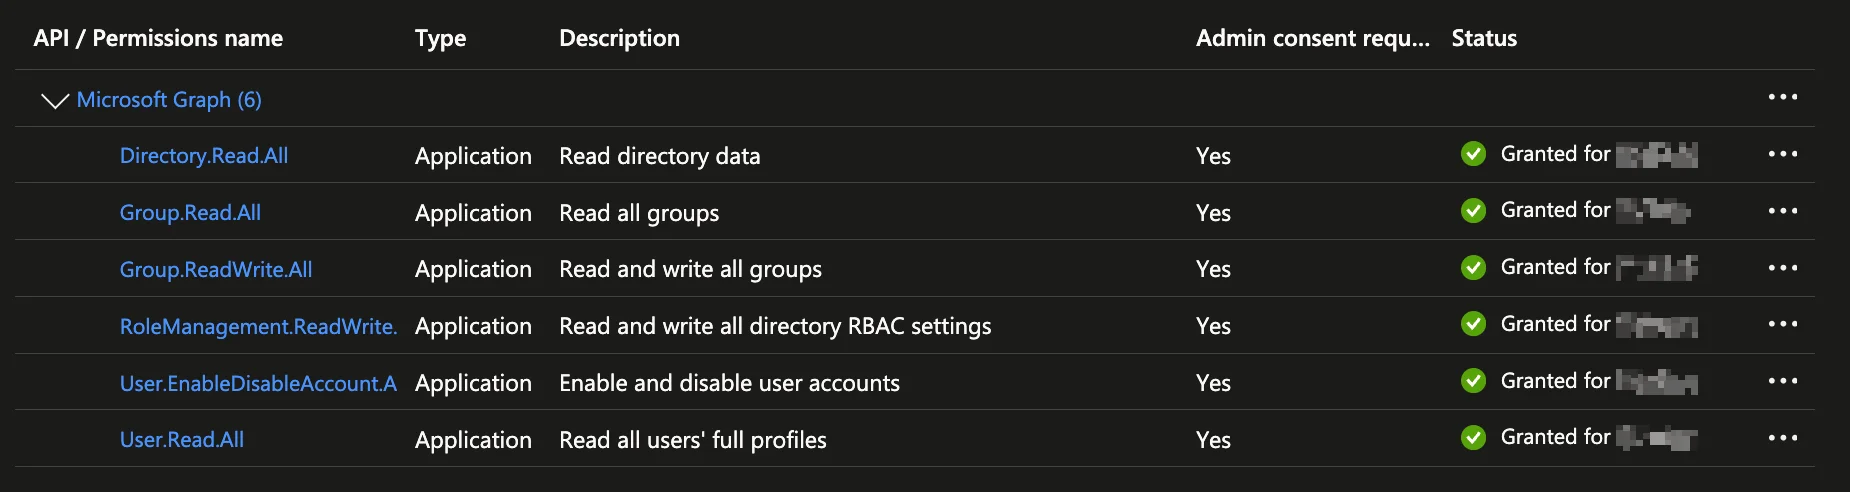
- Required Permissions - Microsoft Graph application permissions for user/group sync and role assignments. See the full, up‑to‑date list: Entra Connector – API Permissions
- Client Credentials - Application (client) ID and client secret from your app registration
- Tenant Information - Your Azure AD tenant ID
If you haven't created an app registration yet, navigate to the Azure Portal → Azure Active Directory → App registrations → New registration. After creation, add the API permissions listed above and create a client secret under Certificates & secrets.
Accessing the Connector Management Page
Navigate to the connector management interface:
- Click Admin in the main navigation menu
- Select Connectors from the dropdown menu
- Choose Entra ID from the connector type tabs
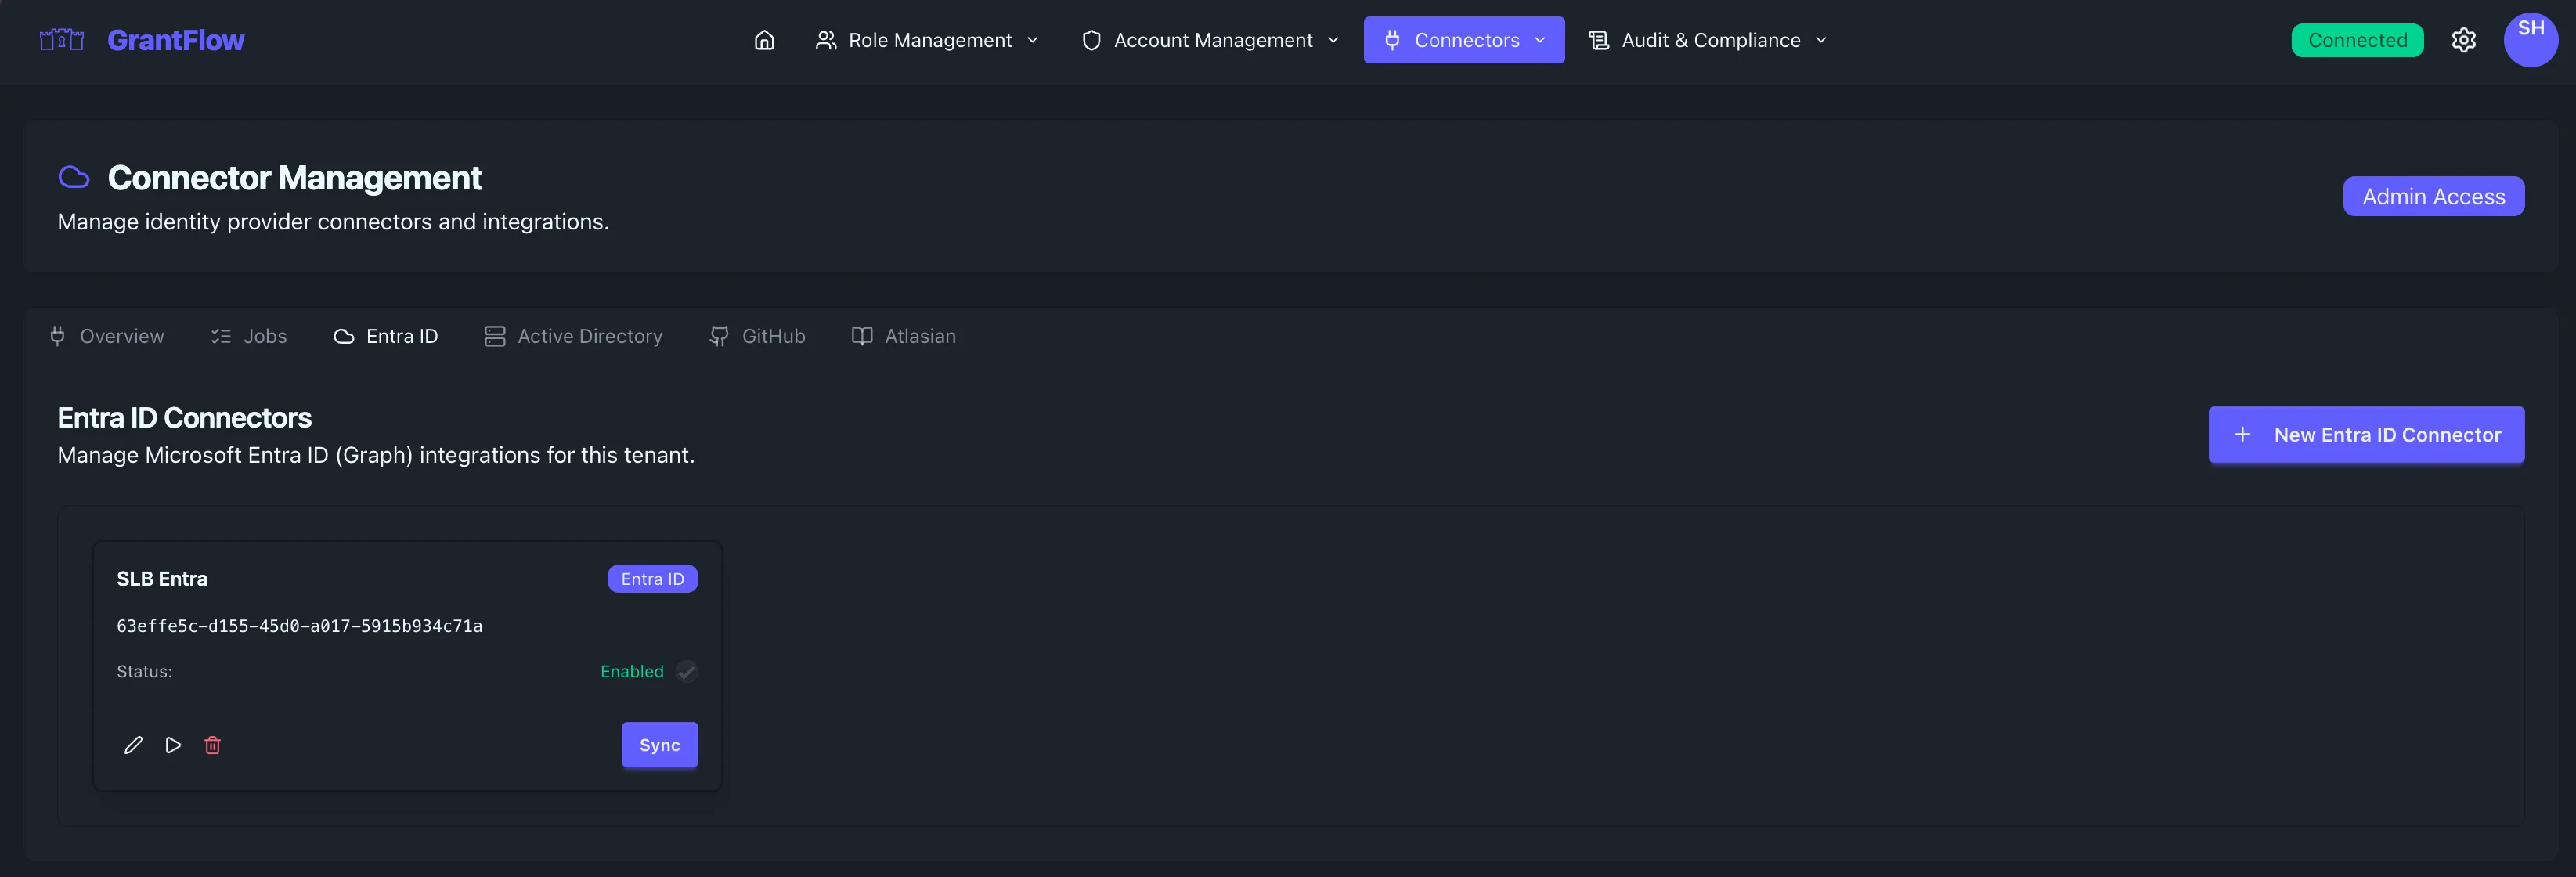
You'll see a list of existing Entra ID connectors (if any) and a button to create a new one.
Creating a New Entra ID Connector
Click the New Entra ID Connector button to open the connector creation modal.
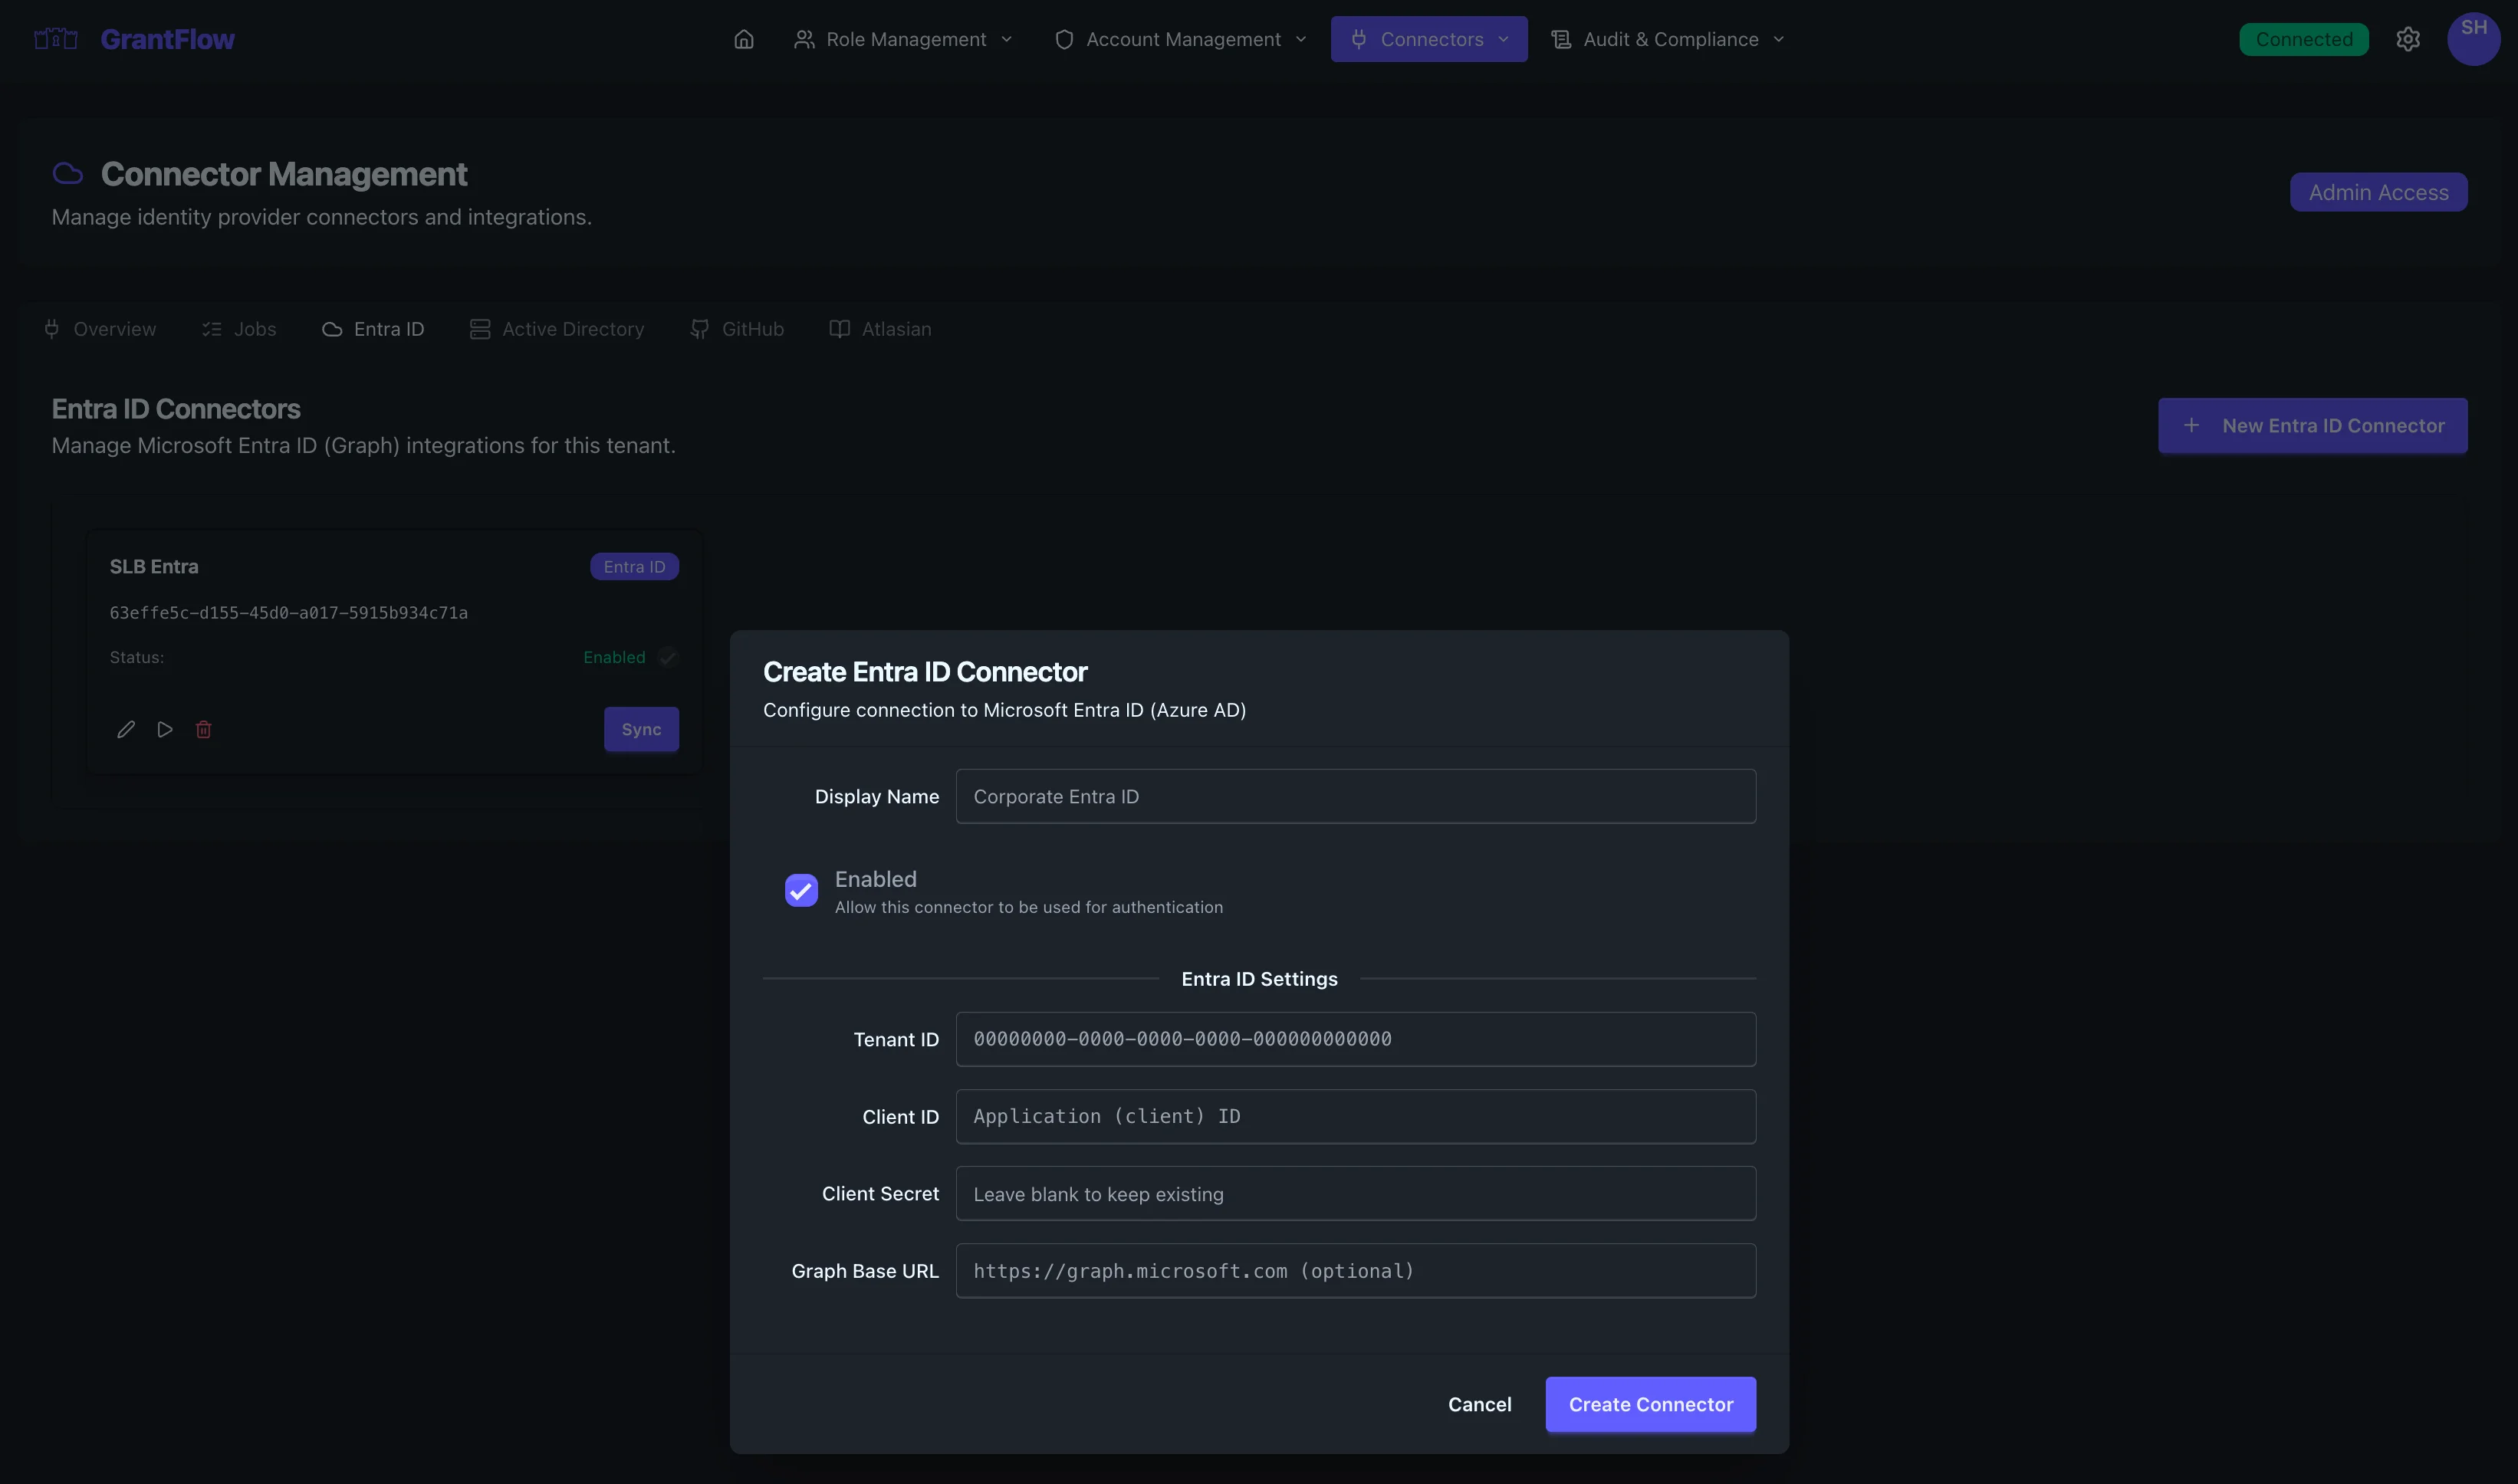
The modal displays all required configuration fields organized into logical sections.
Basic Configuration
Display Name
Enter a descriptive name that identifies this connector within your organization. This name appears throughout the GrantFlow interface when displaying connector information.
- Example: "Corporate Entra ID", "Production Azure AD", or "Marketing Tenant"
- Best Practice: Use names that clearly identify the environment or organizational scope
Enabled Toggle
The enabled checkbox controls whether this connector is active and available for authentication and role activation operations.
- Checked (default): The connector is active and can be used for new operations
- Unchecked: The connector is disabled; no new operations will use this connector
Disable a connector temporarily when performing maintenance, troubleshooting connectivity issues, or during planned system changes. Existing activations remain unaffected.
Entra ID Settings
This section contains the Microsoft Azure AD specific configuration that enables GrantFlow to authenticate and communicate with your tenant.
Tenant ID
Your Azure AD tenant identifier (GUID format). This uniquely identifies your Microsoft cloud directory.
- Format:
00000000-0000-0000-0000-000000000000 - Where to Find: Azure Portal → Azure Active Directory → Overview → Tenant ID
- Example:
63effe5c-d155-45d0-a017-5915b934c71a
Client ID
The Application (client) ID from your Azure AD app registration. This identifies the application that GrantFlow uses to access Microsoft Graph.
- Format:
Application (client) ID - Where to Find: Azure Portal → App registrations → [Your App] → Overview → Application (client) ID
- Example:
a1b2c3d4-e5f6-g7h8-i9j0-k1l2m3n4o5p6
Make sure to use the Application (client) ID, not the Object ID. These are different identifiers shown in the Azure portal.
Client Secret
The client secret (application password) that authenticates your application with Microsoft Graph.
- Security: This is a sensitive credential; it's masked in the UI after entry
- Where to Find: Azure Portal → App registrations → [Your App] → Certificates & secrets → Client secrets
- Best Practice: Store the secret value immediately when created; Azure only displays it once
- Expiration: Client secrets expire; set calendar reminders to rotate before expiration
Client secrets expire based on the lifetime you selected during creation. Monitor expiration dates and rotate secrets before they expire to prevent connector failures.
Graph Base URL
The base URL for Microsoft Graph API calls. This field is pre-populated with the standard endpoint and rarely needs modification.
- Default:
https://graph.microsoft.com(optional) - When to Change: Only modify if using a sovereign cloud (e.g., government clouds) or testing environment
- Examples:
- Global:
https://graph.microsoft.com - US Government:
https://graph.microsoft.us - China:
https://microsoftgraph.chinacloudapi.cn
- Global:
Most organizations use the default Graph endpoint. Leave this field with its default value unless your tenant is in a sovereign cloud environment.
Saving the Connector
After filling in all required fields:
- Review all settings for accuracy
- Verify the tenant ID matches your target Azure AD tenant
- Confirm the client ID and secret are from the correct app registration
- Click Create Connector to save
The system validates all fields before saving. If validation fails, error messages appear next to the relevant fields.
Field Validation Requirements
GrantFlow validates connector fields to ensure security and proper operation:
| Field | Requirements | Validation |
|---|---|---|
| Display Name | 1-100 characters, no control characters | Required, sanitized |
| Tenant ID | Valid UUID format | GUID format check |
| Client ID | Valid UUID format | GUID format check |
| Client Secret | Non-empty | Required (stored in Key Vault) |
| Graph Base URL | Valid HTTPS URL | URL format validation |
Common Validation Errors
"Invalid UUID format" - The Tenant ID and Client ID must be valid GUIDs in the format xxxxxxxx-xxxx-xxxx-xxxx-xxxxxxxxxxxx.
"Invalid URL" - The Graph Base URL must be a valid HTTPS URL.
"Authentication failed" - The client credentials are incorrect or the app registration lacks the required permissions.
"Insufficient permissions" - The app registration is missing required Microsoft Graph permissions. See Entra Connector – API Permissions for the required permissions.
The system validates your credentials by making a test connection to Microsoft Graph. If successful, the new connector appears in your connectors list with an "Enabled" status.
What Happens Next
Once created and enabled, the Entra ID connector:
- Syncs Users and Groups - Begins initial synchronization of users and groups from your Azure AD tenant
- Enables Role Management - Allows GrantFlow roles to reference Entra ID roles for JIT activation
- Supports Activation Requests - Users can request and activate Entra ID roles through GrantFlow
- Maintains Audit Trail - All operations through this connector are logged in the audit system
Testing the Connector
After creation, verify the connector is working correctly:
- Click the Test button on the connector card
- Review the test results for successful API connectivity
- Navigate to Admin → Account Management → Accounts
- Verify users are being synchronized from your Entra ID tenant
- Check that Entra ID roles appear in Role Management → Entra ID Roles
Initial synchronization may take several minutes depending on the size of your directory. Large tenants with thousands of users may take 10-15 minutes for the first sync.
Troubleshooting
Connection Test Fails
If the connection test fails, verify:
- Tenant ID: Ensure the tenant ID is correct and matches your Azure AD tenant
- Client ID: Confirm the client ID belongs to the app registration in the target tenant
- Client Secret: Check that the secret is valid and hasn't expired
- API Permissions: Verify all required Microsoft Graph permissions are granted and admin consent is provided
- Network Connectivity: Ensure GrantFlow can reach
https://graph.microsoft.com
Users Not Syncing
If users aren't appearing after creation:
- Wait for Initial Sync: First sync can take 5-15 minutes for large directories
- Check Connector Status: Ensure the connector is enabled
- Review Sync Logs: Navigate to Connectors → Jobs to view sync job status
- Verify Permissions: Confirm
User.Read.AllandDirectory.Read.Allare granted with admin consent
Permission Errors
If you encounter permission errors:
- Navigate to Azure Portal → App registrations → [Your App] → API permissions
- Verify required permissions match Entra Connector – API Permissions
- Check that admin consent has been granted (look for green checkmarks)
- If permissions are missing, add them and click "Grant admin consent for [Tenant]"
- Wait 5–10 minutes for Microsoft Entra to propagate changes and retry the test
Next Steps
After successfully creating your Entra ID connector:
- Configure Roles: Create GrantFlow roles that reference Entra ID role assignments
- Set Approval Policies: Define who can approve requests for Entra ID role activations
- Assign Eligibilities: Grant users eligibility to request specific Entra ID roles
- Monitor Operations: Review connector jobs and audit logs regularly